Sunday, March 4, 2012

Contemporary Glamour


28mm, speed 1/160, aperture f/13, ISO 200
Time for another model photoshoot.  I’ve recently done “themed” model photoshoots.  The idea is to do something different each time whether it’s a unique setting, different lighting, different looks, or unusual clothing.  This time was no different.  

First I needed a theme.  Normally, this isn’t hard since I have tons of themes littering my brain, but I always do research.  I decided on “contemporary glamour” for this shoot.  The idea came to me after looking at old black and white glamour photographs of 50-60’s movie stars, especially Marilyn Monroe.  With a theme in hand it was time for planning.  For this shoot I wanted a makeup artist, hair stylist, and a studio.

First thing was to hire a local model. My criteria were specific.  A model with some experience, an interest in glamour-like work, a bit hard-girl (i.e. tattoos) style and medium length blonde hair which would allow for a Marilyn Monroe hairstyle.

I found the model I wanted using my Facebook contacts, and after a few back and forth messages she said she was good to go.  Facebook has been a good resource for the Indy photography scene to hire models.  I’ve not had any luck with ModelMayhem.

Next, was to select the make-up artist (MUA).  To my surprise this was easy.  I wanted to go with someone familiar, so I contacted a MUA I met previously.  I reached out to Sasha Niles-Carnes, and she said yes.  BTW, her work is uber.

Next up, the studio.  I’ve used a friend’s Stutz Building studio previously, but this time I wanted more controlled lighting and access to a larger softbox.  I have my own lighting equipment, but didn’t want to use it this time.  Dave Fulton’s Spark Art Photography studio came to mind.  I had shot at Dave’s studio during a year end Christmas party, and knew his space was over the top excellent.  I sent him a message, and arranged to rent his space.

45mm, speed 1/160, aperture f/11, ISO 200

Finally, a hair stylist.  Unfortunately, I didn’t have many contacts that do hair, so I put in a few calls and asked around without much luck.  Anyway, I was chatting with someone in my office who gave me a lead.  I followed the lead and had my hair stylist hired.  I also asked a buddy at work who had expressed an interest in photography if he wanted to help out.  He’s a young guy, and please, the thought of hanging out with a pretty model…I didn’t have to twist his arm.

OK, I had the model, the studio, the MUA, my photog second, and the hair stylist.  The fees were negotiated, and once again reconfirmed the photographer’s fact of life…man, this is an expensive hobby.

Next up was a storyboard.  Not really a storyboard, but a series of 6-8 photographs of the look desired.  I sent this to my “people” so they could think about what was being planned.  I’m always surprised how much work it is to plan out a photoshoot!

What’s the worst thing that can happen to a photographer the day before a shoot?  You guessed it…my model contacted me and said she couldn’t make it.  ARGH!  I really wanted to photograph with her, and the last thing I wanted to do was call everyone else and tell them I had to cancel.  Being in business as my day job I realize schedules change at the last minute, so bottomline I was cool with the fact the model needed to cancel.

What to do, what to do.  I put out a distress call on Facebook, and I was stunned.  Literally within an hour several photogs reforwarded my request and at the same time a number of models reached out to me.  A replacement was lined up in no time.   I was surprised I had a following interested in shooting with me…oh, yes it helps when there’s money involved.

Courtney Kennedy hopped on board and was signed up for her normal per hour fee.  She had the style, a hard-girl look and guess what, medium length platinum blond hair.  Karma.

The day of the shoot.  Got several messages from Courtney and agreed on dress for her to bring.  Medium length, tight, black…  I arrived at the studio.  Dave was already there and was the perfect host while I got set up.  We talked through the lighting, electronic triggers, background (I wanted a solid black background for the portraits), and timing.  He then left me to do my thing.  

Sasha, and then Michelle Bueno, the hair stylist, arrived and set up.  I talked them through the schedule, but since they already had the storyboard in advance it wasn’t really needed.  Courtney arrived and they got at it.   

50mm, speed 1/40, aperture f/3.2, ISO 560
For this shoot I brought the following:
 My weapon of choice was the Nikon D300s with the 24-70mm lens for all of the studio and speedlight shots.  I used the D200 with the 35mm or 50mm lens for the shots I took during the MUA/hair work.   The plan was to use the Mamiya for a couple of rolls, but unfortunately we ran out of time without using it.  You know a "Girls on Film" type of effect.

Once I got set up we all chatted while the make-up and hair got finished. The makeup and hair took a little over 1 hour.  I had rented the studio for 2 hours, so this was cutting things close.  No dramas, Dave was cool and said I could use the studio for another 30 minutes, or so if I wanted.  While the makeup & hair was being done I took several candid shots with the D200.  For the candids the D200 was set on program mode.

All, done, so it was time to get to business.  I had 2 sets of shots planned.  The first with Courtney at the makeup table.  The plan was to shoot her reflection in the mirror both touching up makeup and looking off in different directions.  This set used an off camera speedlight with the RPS softbox as fill light and the lights on the makeup table as the key light.  The studio lights were turned off.  I triggered the speedlight with my Elinchrom Universals.  The speedlight was set at manual mode 1/8 power.

Throughout the shoot I was in manual mode, the first series the ISO set at 400, speed at 1/100 - 1/125 and aperture between f/3.5 down to f/4.5 depending on the DOF I wanted to capture.  White balance was set at incandescent.  Since the makeup table had the brightest lights color temperature was adjusted in post.  On the second series which is under studio lights the ISO was set at 200, speed at 1/160 and aperture at f/11 down to f/13.  

I asked Courtney to move around the table, stand up, cross arms, look at me, look off, look at herself, etc.  I shot her close up, standing behind, standing on a stepstool, and into the mirror.  Within 30 seconds I knew she was a pro. 

26mm, speed 1/125, aperture f/4.5, ISO 400

58mm, speed 1/100, aperture f/3.5, ISO 400
 After about 150 images to the backdrop which was the second set planned.  For the portrait / head, upper body shots I used a hairlight consisting of a gridded Paul C Buff striplight on a boom.  The studio monolight was an Alien Bee triggered by the key light.  The key light was a Profoto ComPact-R 1200c monolight with a HUGE softbox.  The monolight was triggered with an internal PocketWizard.  The Profoto was set to ¼ power positioned about 3 feet from Courtney, camera right.  The hairlight was set at 1/8 power and placed about 2 feet above and 6 inches behind Courtney’s head.  Once again the studio lights were off.

Camera in manual mode with the same settings as mentioned above. 

For this series my goal was to capture mainly head and shots from waist up trying to generally replicate poses Marilyn Monroe did.  Courtney needed only limited direction, and when I did direct her, she was a pro.  She held her poses until I told her to move which was great.  We did a series of head shots tight, more open head shots, waist up shots from different perspectives, dress open to show more cleavage, dress closed for a more demure look, & head in different position.  

24mm, speed 1/160, aperture f/13, ISO 200
 After about 150 shots we were finished. 

Oh, did I mention my second shooter had to cancel at the last minute (no major issues), so I asked Michelle who had stuck around to manage Courtney’s hair and watch the shoot to help me by holding a reflector in a few shots and to help Courtney with her dress.  A fun team.

Bottomline, I was completely happy.  It was a fun photoshoot

After action tips:

·         Although it’s often impractical it’s a good idea to have 2 models or someone on standby if one cancels or “no-shows”. 

·         Test the light settings while the makeup is being done.  In this case I didn’t do it because I didn’t have someone to use for the test.  It didn’t really matter on this shoot because I had my camera / lights locked in after just a couple of shots.

·         Keep everyone’s phone numbers and contact information handy and in one place.  Common sense, but I often put information in my notebook, in Facebook, on my iPhone, etc. 

·         Bring copies of photos (hard copies or electronic) to the shoot so everyone can reconfirm what is needed.  In this case I had created a “storyboard” and it worked well.  It was used several times.

·         Make sure everyone gets paid before you leave.  For this shoot I paid everyone before we shot.  Again, common sense to pay people, but after all my planning I forgot to pay the model because she was the last to come in.  I ended up paying her the next day. 

·         Keep your gear organized and know what you brought.  Dave’s studio is well equipped and when cleaning up I could have thought “is that Dave’s or mine?”  I kept everything together on a table.


Thursday, February 23, 2012

Polaroid Colorpack II - Part Deux

Hey, all you guys and guyettes, no, no I haven't given up digital.  Digital remains my weapon of choice, and what I enjoy using for my photography.  It's just that I've gotten on this Polaroid bender and I need to play it out. 

Abandoned Home - hazy overcast
Anyway....I bought another Polaroid the other night.  More on that in a later post, but in the meantime I had the opportunity to shoot some black and white using my ultra-retro Polaroid Colorpack.  This time I used Fujifilm 3200B which is high ISO (sorry ASA for the film geeks).  I shot several indoors images using the high ISO film, and no joy, the images were too dark.  I then switched to outside shots in moderate to bright lighting and wow, the quality is right out of the 60's.  So buttery and smooth. 
Lamp Post at Starbucks
No one is home
I did buy some Flashcubes online, but alas my $1 Goodwill purchased Colorpack II doesn't seem to work with flashcubes.  They didn't fire, so it appears for this camera I'm stuck with outdoors or high light images.

Anyway, the camera has minimal settings. There is a light / dark dial on the front of the camera.  When I went outside I set the dial to the middle setting.  I spent all my time making sure I set the distance dial correctly and focusing on the composition.  Bottomline, the images are NO way close to the quality you can get using digital, but there is something uber about pushing the shutter release and pulling the film out of the camera and peeling the backing off of it.  So retro.  A good compliment to my digital life.


It's always a good time for Santa
Enjoy diversity.

Tuesday, February 21, 2012

Polaroid A-Go-Go

Went to the local Indianapolis Creative Gathering aka Artist Meetup at the Khoury Restaurant in Broad Ripple.  Got a chance to chat with several local artist, primarily photographers.  Event is organized monthly by a local Indianapolis uber-painter Travis Little.

One fun thing is that I brought several of my newly acquired Polaroid cameras and my Polaroid Spectra II that I've had for years, but just recently brought out.  Took a few shots of the people I chatted with.  As you can tell, the quality of the film leaves much to be desired, but come on, it's a Polaroid and you are supposed to get muted colors and limited contrast.

Careful shooting Polaroid film.  A key is to get film from the Impossible Project or depending on the Polaroid model, from Fujifilm.  Most film you get off the internet from Polaroid is well past it's used by date.  Any, oh by the way, the film is pricey....

The following are from my Polaroid Spectra camera.

Stacy, Paul, Ryan & Wilbur, all local photographers

Hey, it's me! Photo by Paul


Saturday, February 18, 2012

Polaroid Colorpack II - Retro Goodness

The first shot after I bought the film - Behind Roberts Camera in Indianapolis
I’m a photography podcast fanboy and recently watched a podcast by Chase Javis on his InvitationToHang project in NYC from last year.  The podcast showed the cameras he was using for the project.  Several were old school Polaroid cameras.  As I watched the podcast it was POW…flashback.  I used to shoot Polaroid cameras, and I thought to myself, I bet I still have one.

Anyway one thing led to another and I dug up my old Polaroid, a Polaroid Spectra 2.  It had been collecting dust as I was now a fully committed digital shooter.  Just for giggles, I went to Roberts to see if they had any film for the Spectra and they said nope.  They did however have film for the 600 series and Fujifilm for the ColorPack series. Note, I’ll post another blog on the Spectra as I did get some film online from the ImpossibleProject.

Anyway since I didn’t find any film for my Spectra camera, I went on a personal mission to find a ColorPack or 600 series Polaroid camera.  I wanted to get one as cheaply as possible. Guess what – SUCCESS.  I went to a local Goodwill Outlet and I found this beauty.

Polaroid Colorpack II instant camera in good working order
I grabbed it and the final price, only $1.  I thought to myself, even if it didn’t work, come on Steve, it’s only a buck.  I brought the dusty beast home and cleaned the outside & the corrosion in the battery area.  The next day I went back to Roberts and bought a pack of 100 ISO color Fujifilm and a 3000 ISO black & white Fujifilm.  I loaded the color film, held my breath and guess what, it worked.  Sweet.


Today I went out and shot the full color pack (only 10 photos) and, it’s fun.  This pack was basically just to figure out how to dial in the camera, and figure out how to use it.  At 100 ISO a sunny day means you have some blown out or images pushing the right side of the histogram.  There is a dial on the front that you can dial to darken or lighten and I found outside I needed to turn it to full darken and the images came out fine.  The images below have one shot with "normal" setting, and the second with the dial set to "darken"


I also shot a couple of images inside earlier and the results were no good.  WAY too dark for 100 ISO file.  Looks like I need to find some Flashcubes online.

Ambient light without a flashcube with 100 ISO film - EPIC fail
The fun thing about this camera is that it’s manual focus and that’s about it.  You basically point and shoot.  The lens ring has distance markings on it that you turn to the right distance of your subject.  Since this is NOT a DSLR you are doing lots of guessing to get the focus right.  However, in my first film pack that didn’t seem to be an issue.

The second fun thing about this camera is that once you shoot a photo, you “pull” the film out of the camera and let it develop.  Very old school.

The only drawback to this camera is that the film is somewhat expensive.  A 10-pack is in the $15 range.  Not as expensive as the 600 or Spectra type film, but unlike a digital camera you want each shot to count.

Bottomline, good times and a fun compliment to digital.

Sunday, January 29, 2012

Shamless Self Promotion Alert - f/2.8

An Essential For Any Photographer's Car !!

I know you've seen the bumper stickers that say "26.2" on them, right?  I always wondered what they meant. Then one day I learned it was the distance of a marathon (and to think I ran one before, and it hadn't clicked).  Anyway, get it, there is a marathon runner in this car.

I thought it would be fun for photographers to have an equivalent, so a light popped on.  I'll create my own.  I went online, found a site, and played around with several ideas and found a simple design I liked.  Here you have it, "f/2.8".  Only a photographer will know, that car has a photo enthusiast on board.

The shameless promotion part, I'll sell them, and I put my blog URL on it as well

I decided to go ahead and have a bunch of the bumper stickers made up.  I figured I could put one on my car or on my photo notebook.  And, hey, if anyone wanted purchase one to trick-out their car, I'd have a few available.

So, if anyone wants to buy one, shoot me an email at sebrokaw@yahoo.com and we can work out the details.  I'll charge the low price of $3.50, and you can pay me via PayPal.  Operators are standing by!

Be the first one on your block to have a www.brokawimages.com, f/2.8 bumper sticker!  You can thank me later :)

Dirty car not included

Friday, January 27, 2012

Indianapolis XLVI

1.6 seconds, f/10, ISO 200, 12mm using Tokina's 12-24mm f/4

People, it's Super Bowl 46 time in Indianapolis.  You know what that means - photo opportunity! We are talking about tons of people, challenging lighting and LOTS of color and action.  Picture Perfecto. 

I headed down the day before the formal activities started to try to capture some views before the party begins.  The challenge was that although it's winter the weather is more late fall like.  Cold and rainy, and it had been raining most of the day.  It just so happened as soon as I parked it stopped raining.  That gave me an opportunity to walk around and shoot some images around Monument Circle which is in the core of Indianapolis.

This time I wanted to capture LOTS of the image so I brought my Tokina AT-X 107 AF DX Fisheye – 10-17mm f/3.5-4.5 and a Tokina AF 12-24mm f/4 AT-X Pro DX.  I am a Nikon guy, and prefer to use Nikkor lenses exclusively.  However, I've found that Tokina lenses are as good as my Nikkor lenses.  The only problem is that I don't shoot wide angle that much so I figured this was going to be fun.

2 seconds, f/7, ISO 200, 11.5mm using Tokina's 10-17mm f/3.5-4.5

It was pretty dark outside, and very overcast, so light reflected off the low lying clouds.  This made for some really cool effects when long exposures was done.  For these shoots I simply used my Manfrotto tripod.  I set my Nikon D300s to the lowest ISO so I could minimize as much noise as possible.  Therefore all shots were set at ISO 200.  I also shot all images at F/7 or smaller.  I wanted to get long DOF & light starbursts. 

There were lots of people downtown, but not enough for me to be a bother while standing on the edge of the road with a tripod.  It was fun and the vibe of the city was growing.  You could tell a BIG party was coming. 

I only shot about 50 images, about 50 % with the fisheye and the rest with the wide angle.  Both lens focus smartly and are tack sharp.   The also focus very well in low light, which tends to be a large percentage of my shots.  Bottomline, great lenses.  When I go back out to shoot the event as a run up to the Super Bowl, I will definitely bring these lenses.

0.4 seconds, f/7.1, ISO 200, 10mm using Tokina's 10-17mm f/3.5-4.5

After action comments:

  • On weather like this keep a rag or small towel in your bag.  Even though it was not raining buckets it did start to sprinkle, and I didn't have anything handy to clean off my lens.
  • Watch out for blowing out portions of the image.  These were fairly long exposures and there was some pretty bright lights.  I had several images that had significant areas blown out.  Post processing can only correct areas of an image if there are pixels.  Check your histogram.
  • If you want starbursts keep your aperture at f/9 or higher
  • Take advantage of wet pavement.  Try to capture unusual light patterns or shadows. It's pretty cool.

Tuesday, January 3, 2012

New York City Boy


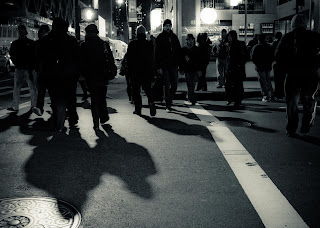
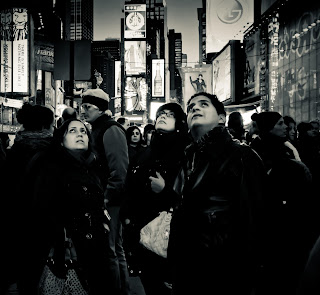
The day before New Year’s Eve I visited New York City and walked around the streets for about 8 hours.  Big city, people in the street, colors, darkness, camera – you guessed it, I had a blast.  I didn’t go specifically to take photographs, but I did tote my camera and a couple of lenses.  I ended up walking in a 1 mile radius around Time Square shooting while walking.  I simply wanted to capture the hustle and bustle of NYC.

It started out grey and overcast turning dark quickly.  Therefore, during the daylight hours I had a huge softbox.  Shadows were not a problem.  At night the lights of the city were alive with color.  On top of this the number of people in the city was HUGE all day.  It was absolutely no place for a tripod.  I simply set my camera on aperture priority, set the aperture as small as I could for the light (I wanted to get maximum DOF) and the shutter speed ended in the 1/100 range.  As it got dark I had to crank up my ISO from 400 during the daytime to 2500 at night.  I wanted to keep my speed no slower than 1/100 so I took lots of high ISO shots.  I was using my trusty AF-SNikkor 24-70mm f/2.8G ED most of the day, switching out of my AF-S DX Nikkor 18-200mmf/3.5-5.6G ED VR II early in the day.  I sacrificed a wider focal length on the short end for a couple of stops of aperture.  Good choice.


Almost all of my shots were taken while walking or stopping just briefly enough to steady my camera and get off my shot.  I was walking with my two 20+ year old boys so I decided not to stop to chat up people to take more formalized street portraits.  Anyway, in NYC from experience taking street portraits can be hit and miss. 

When I got home and looked through my photos I was very happy but noticed the colors tended to dominate the image.  Therefore in my post processing I converted several to B&W, which I think worked out well.

Next time I plan taking my tripod and going solo, although being with my boys was a blast.  Oh, by the way I did end up hitting B&H Camera as well.  Icing on the cake.


After action tips: 

·         Be respectful but don’t be afraid to take candid street shots in a city.  OK, some people will give you the evil eye, but people are moving so fast and in their own little word it passes quickly

·         In a street shoot like this it would have been better with a smaller profile prime lens.  Not only does a D300s Nikon with a batter grip stand out, but add a 20-70mm f/2.8 lens and you have a big camera setup.  I probably would have been better bringing my AF-S Nikkor 50mm f/1.4G prime or my AF-S Nikkor 35mm f/1.8G prime.  Faster glass with smaller profile.

·         If you can avoid it don’t take a backpack.  Note to myself, people don’t like getting hit by a backpack when you turn around suddenly.

·         Be careful shooting in some venues or buildings.  Not surprising very few office buildings and museums let you take photos in their facility.  No worries, that’s when my iPhone 4S came in handy.

·         Take every opportunity to shoot photographs.  In a city of any size there are hundreds of photo opportunities.