Showing posts with label Nikon D300s. Show all posts

Sunday, December 30, 2012

Nikon D600 - My Thoughts

Well, I've been using Nikon's D600 full frame DSLR for about a month.  I upgraded to a D600 from my trusty Nikon D300s.  Over the past month I've used the D600 for all of my shoots.  I've had a month worth of model shoots and several after dark photoshoots to give it a workout.  It's time for an update on what I like & don't like about my first digital full frame camera.

Bottomline, there are several features compared to my D300s I don't like, but overall I'm happy with the camera.  The following is what I like the most about the D600.
  • Full frame sensor with a higher megapixel file size,
  • I can use my Nikkor lenses at their true focal length (my AF-S 70-200mm f/2.8 ED VRII, is a true 70-200mm),
  • Better low light sensitivity with a higher ISO top end.  At an equivalent ISO compared to my D300s I see less noise.  On top of this I can take the ISO several steps higher than the D300s.  This is great for my low light work,
  • ISO goes to 100 versus 200 for the D300s on the low side (note, it has 3 L settings below 100),
  • The monitor is big and bright. 
  • The D600 is the smallest of my DSLR's.  It makes street photography more stealthy.  The caveat is I've moved most of my street photography to film rangefinders, so you have that....

However, I'm not completely a D600 homer.  There are some things I find both curious and a bother.  Here's what I don't like:
  • ISO / WB buttons on the back of the camera as a second function versus dedicated buttons on the top left mode dial like the D300s
  • Why is there a "Scene" option on the Release-Mode Dial?? I'll never use this option.  I don't want to sound "all-that", but aren't scene options for point and shoots?
  • You need fast SD cards to take advantage of the burst modes.  In studio I often shoot in burst mode  to capture flowing hair of my model.  Unless you use top end cards the write speed is TOO SLOW.  Understand, I had really slow SD previously, but upgraded to class 10 - 95mb/second cards.  Problem solved.  I think this will be a problem for sports shooters or anyone that does high speed work.
  • No sync cord plug.  I ended up buying a sync cord attachment that fits in the hotshoe.  I could have used it the other day when I was shooting in a different studio and needed a sync cord for the studio strobes.  I ended up using my Elinchrom EL-Skyport triggers.
  • No 10 pin adapter plug.  Great, now I have to replace both my wireless and wired shutter release.
  • The camera feels flimsy & plasticy.  OK, not sure "plasticy" is a real word, but that's how it feels.  My D300s is a tank compared to this camera.  Slap an AF-S 70-200mm lens on this camera and the balance is way off.  This will probably improve when I get a vertical grip.
  • The multi-selector dial on the back of the camera is too small.  Seriously, Nikon, what gives?

Don't get me wrong, I really like the upgrade to a D600, and I'll get comfy with the changes.  I'm sure most of my issues are simply due to the muscle memory I developed with the D300s.  I didn't think I needed the file size of a D800 and I can't justify a D3 or D4 series.  The D600 fit my needs and wallet perfectly.  


Saturday, December 29, 2012

Tattoo Style - Session Two


As I mentioned in an earlier post I respect tattoos as an artform.  Of course, if they are done well.  I decided to do a model photoshoot series with the focus on the model’s body art.  This shoot was Session Two.  This time I hired Ashley Ogburn who was getting into modeling, and brought a good mix of tattoos.  I also hired MUA, Emmy Lindgren who came recommended (she's also a model).  To mix things up I invited local photographer, Chris Pickrell, to join me on this shoot.  I’ve followed Chris’s photography for about a year.  I like some of his portfolio, so I thought I could watch him work and check out his technique.  I enjoy doing both pressing the camera shutter button and watching other photographers work.
 
The setting for this session was a combination of industrial gritty and studio work.  The industrial side of the shoot was done in the industrial side of the complex where M10 Studio is located.  The studio was of course M10 Studio. With everyone lined up and the time set I let both Ashley and Emmy know specifically I wanted for this shoot.  I sent them sample shots I wanted to try in advance along with makeup style recommendations.
 
For this shoot I asked Ashley if she would to do one set in lingerie.  She has some really nice scroll lettering above her belly button, and tattoos on her upper thigh, so I wanted to get this clearly visible.  Nothing sexual, more fine-art style.  She was good with this.  
 
When everyone arrived Emmy got to work making up Ashley while Chris and I sat around and chatted.  We agreed what Ashley would wear for the first part of the shoot.
 
Studio strobe as key light camera right

Studio strobe as key light camera right
Since we did first part of the shoot in the complex I loaded up everything on our roller cart.  I had an Elinchrom D-Lite 4 with a softbox as a key light as needed.  I also had my Nikon SB-600 speedlights as needed for fill lights.  My speedlights were triggered with Elinchrom EL-SkyPorts.  Also a large gold/silver reflector to bounce the available light as needed.  The complex has large industrial windows so I can get a good mix of sunlight or shadows.  I used both my Nikon D300s with an AF Nikkor 85mm f/1.8 D, and my Nikon D600 with my AF-S Nikkor 70-200mm f/2.8 ED VRII.  Settings for both cameras was started at their lowest ISO, f/5.6-6.3, and speed starting at 1/125.  I adjusted these settings throughout the shoot.  
 
With this kit we went to the back of the complex and shot 3 series.  I directed Ashley during my part of the shoot in order to focus on her tattoos.  The majority of my shots were photographed with my lighting gear set up and being moved around to get different effects and shadowing.  During Chris’s portion he did all of his work with available lighting using my reflector for a few shots.  I liked the output he achieved using the complex mixed lighting.
 
Available light only
We shot against a white concrete wall, a red industrial door, a wall of metal studs, a plastic sheet that was stretched between 2 metal columns, and a white canvas stretched across a storage area.  
 
After about 1 ½ hours we went back to the studio for a set against a white seamless.  For this I had Ashley change into her lingerie.  I set up an Elinchrom D-Lite 4 with a large Elinchrom beauty dish as the key light.  I also used my 2 Nikon speedlights firing against the background to get a high key effect.
 
Once ready I posed Ashley standing, sitting, and laying down for this shoot.  I did a few of the shots standing on a ladder so I could shoot down on her.  During this session I adjusted the studio light regularly to get the proper lighting on Ashley’s tattoos.  I like some of the photos I got.  Chris didn’t shoot during this portion.
 
In Studio on a white seamless

Shot down from a ladder
Bottomline, this was a fun shot and I enjoyed watching Chris shoot as much as I enjoyed working with Ashley.  She was fun to talk with and easy to work with.  Also, she had the tattoos that were the theme of the shoot.  I think I’ll do another shoot in this series again in studio.
 
Chris Pickrell directing Ashley
MUA Emmy Lindgren
After thoughts:

·         Watch the model to make sure she’s comfortable.  It’s winter and the complex was cold (studio was toasty).  Make sure he or she has regular breaks and has a coat to wear as needed.  We did this and I even brought a space heater into the studio, but it really wasn’t needed,
·         This was my first shoot where the model was laying down and I shot over her shoulder.  I got a couple of good shots, but need to practice more with this technique,
·         Don’t go overboard on the color saturation.  Ashley’s tattoos were either black or colored.  A few of the ones in color were muted tones.  I resisted the urge to pop the color by increasing the saturation.
·         Watch what’s around you.  While Chris was shooting I photographed him, and even turned around and photographed Emmy who was watching the action.  I really liked these images.

Sunday, November 4, 2012

Fusion of the Arts – Oranje!!


This was the 4th year I’ve gone to Oranje in Indianapolis to photograph the event.  Oranje is advertised as “an interactive experience of art & music”.  You know what, it is!  There’s art, different genres of music, colors, sounds, lights, dark, pretty people, motion, etc.  You guessed it, a photo rich environment.  Challenging photo conditions, but that’s what I like about Oranje.  Also from a photographic standpoint, it’s very interactive.  You can mix with the participants, get amongst the dancers, photograph from the stages, and talk to the artist.


 As mentioned I’ve done this before, so I knew what to expect and how to kit out.  The big difference in 2012 was Oranje was at the Indiana State Fair Ground in one of the big buildings versus the abandoned building used the past few years.  Structurally, and from parking standpoint it was a much better venue.  But it had a really different vibe.  It seemed more compact, but honestly I think it probably had more space.


 Knowing there was going to be lots of people, lots of motion and extremely low light I brought a simple kit.  It consisted of: 

·         Nikon D300s
·         Nikkor AF-S 35mm f/1.8G
·         Nikon SB-600 speedlight w/ generic domed diffuser
·         2 extra sets of Sanyo eneloop rechargeable batteries
·         Earplugs (believe me, these are VERY useful at an event like this)

Out in my car I also had an AF-SNikkor 50mm f/1.4G & my AF-S Nikkor 24-70mm f/2.8G ED, but I didn’t use them.  I wanted to stay wide & fast (OK, take your mind out of the gutter).
 
Anyway, with kit in hand I proceeded to spend about 5 hours walking around the venue listening to & photographing the various music acts, watching the graffiti artists, looking at art, chatting up some of the artist, talking with some friends I ran into, and going overload on the photography.  This was another 1000+ photo night.  The nice thing about the evening, and like other times I’ve gone to Oranje is that no one seems to mind if I photographed from every angle and position.  I photographed from the music stages, amongst the dancers, in the Ketel One club, outside, in the tents, and around the art.  Everyone was cool.  It was great.
 
All non-flash photographs were shot with manual mode.  ISO was cranked up between 1600-3200, Aperture was almost always set at f/1.8 sometimes up to f/4.  Speed was typically at 1/100 or sometimes a bit slower.  I wanted to balance between enough speed to avoid too much motion blur and minimize noise.  It was a challenging, but I always sacrificed ISO for speed.


It was a fun night and I ended up with lots of photos.
 
After action report:

·       Seriously, if you are a photographer and visit a venue like this bring earplugs.  You can thank me later,
·       Travel light.  This is no place for a backpack, or sling bag.  You will be bumping people constantly.  Bring a fast zoom or like I did a fast wide prime.
·       Get close.  At events like this I’ve found that people don’t mind having their photograph taken.  I tended to take most of the photos of people no more than 2-3 feet away.
·        Bring plenty of batteries for your speedlight.  Flash was no problem at a venue like this.  I took possibly ½ my images with flash and it would stink if my batteries ran out. 
·       Take time out to enjoy the event.  I’ve been to Oranje before when all I did was photograph, and actually “missed” the event.  This year I mingled, talked to the artists, listened to the bands, and even bought a big painting.  Oh yes, I took tons of photos as well. 


Sunday, October 28, 2012

Gregory Hancock “Anthology”


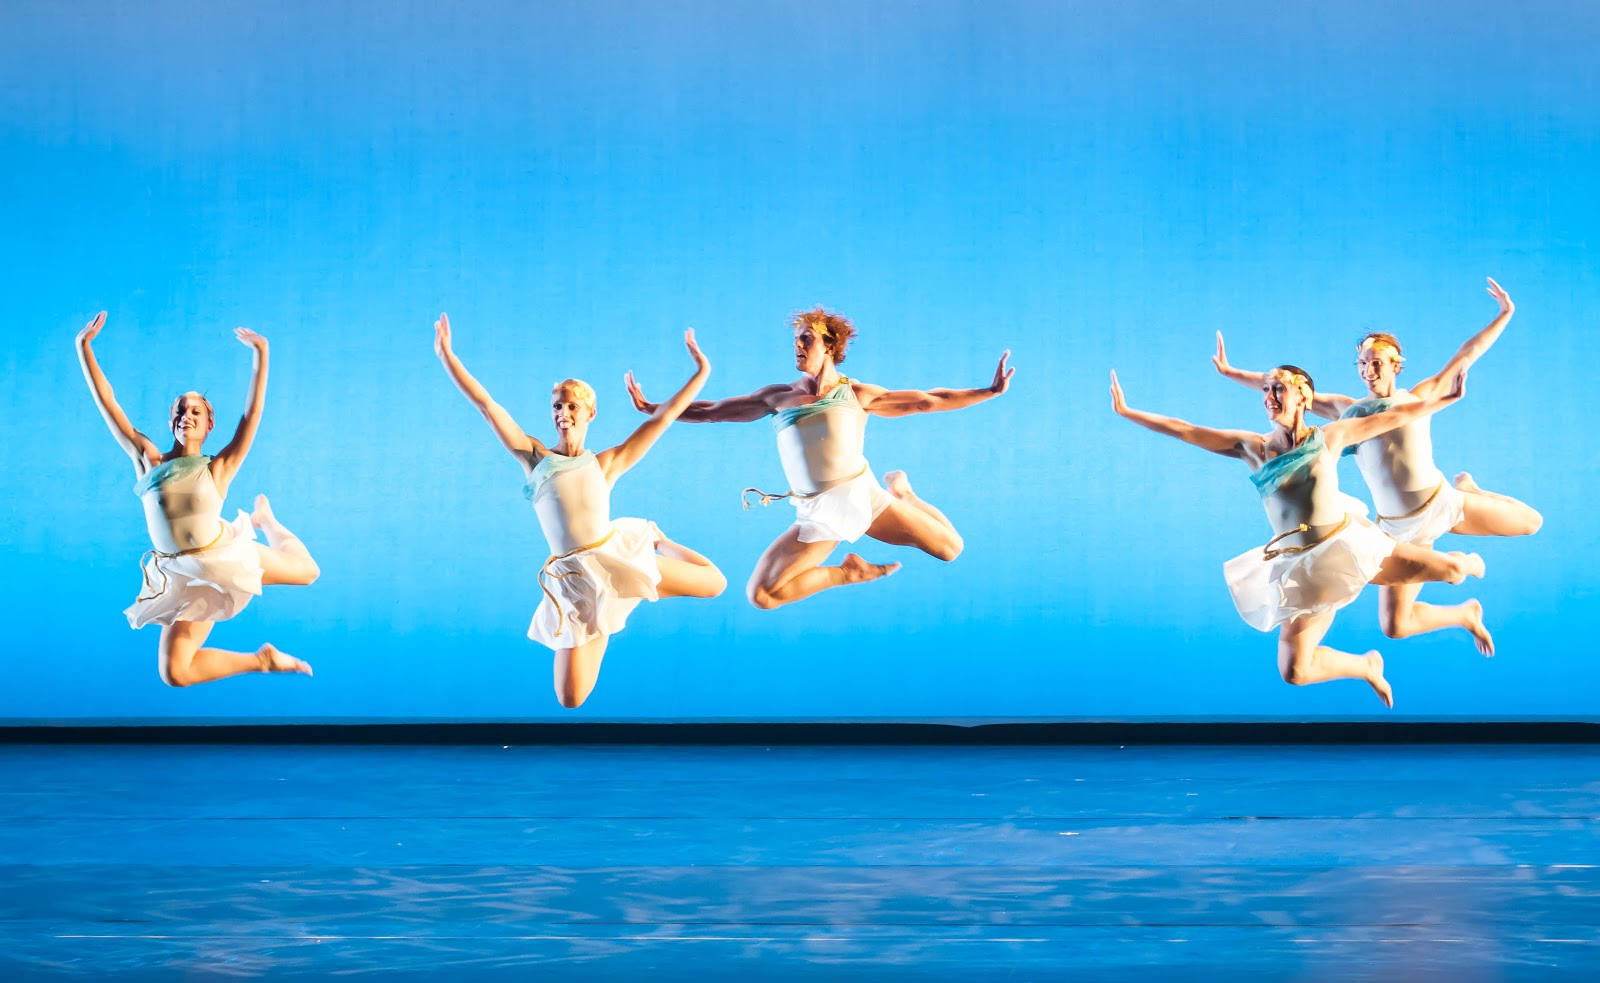
I’ve shot at the Gregory HancockDance Theatre multiple times with the Indianapolis based Photo Venture CameraClub.  Gregory Hancock is a great host inviting us to shoot during their dress rehearsals.  Once again, low light, mixed stage lighting, striking colors & fast motion.  That’s right, a photographer’s fantasy land.
 
I used my standard kit for this type of photoshoot, and manual mode for all camera settings.  I brought the following (using everything):

·         Nikon D300s
·         AF-S Nikkor 50mm f/1.4G prime
·         AF-S Nikkor 24-70mm f/2.8G ED
·         A small flashlight
·         Manual cable release
·         Manfrotto tripod with a trigger handled head

Because I was shooting about 12 rows back I was able to use the widest aperture on all lenses and achieve good DOF.  As mentioned my camera was set on manual with white balance set at 4500 kelvin, speed at 1/160 second and f/1.4 on the 50mm or f/2.8 on the zooms.  ISO was varied between 800 to 3200.  ISO was the only variable all evening. All lenses are great and focus super fast even in the low light setting.  That's uber.


The nice thing about this show was that it was an “Anthology” of previous shows.  That meant multiple themes, multiple costumes, different music and different tempos.  The hardest part of the night was during several of the sets the key light was a large spot light straight over head.  Wow, it was laser beam bright.  Even at 1/160 of a second at higher ISO settings on quite a few pictures the dancers were blown out.  That was surprising, and once again it reminded me NOT to rely on the camera’s monitor only.  If you do, zoom in regularly to check where the histogram right side spikes sit.


The shoot was about 2 hours, and I was really surprised that I took about 2,400 images.  Needless to say it took hours to go through the images.  It was really a fun night for photography.
 
After shoot comments:

·         Check the histogram regularly.  If you see a spike on the far right (over exposed) then check the monitor and magnify the image to see if anything important is blown out,
·         Bring lots of memory cards.  On a photoshoot like this you will go through them quickly since you will shoot in burst mode,
·         Shoot manual ISO (or a preset).  In a setting like this the light color changes regularly.  With manual ISO or a preset it makes it easier to adjust white balance in post,
·         Bring a small flashlight.  You will need it, but cover it in your hand so you don’t wreck your night vision or affect others around you. 


Sunday, September 30, 2012

DY Model Shoot

My wife is a big fan of DavidYurman jewelry.  I’m a big fan of the David Yurman advertisement photography.  I think my interest is cheaper!  Anyway, I decided to try a model shoot with a David Yurman style theme.  


The theme is very straight forward.  The model photography tends to be black & white, minimalist images.  Obviously, showing jewelry and either implied nude or basic clothes.  The images are very clean and tend to be full or partial head shots.  Sometimes waist up.  The goal is a classy image which draws your eye to the jewelry.
 
This shoot was fairly easy to set up.  I contacted MUA, Sasha Star, who I regularly use and Amanda Veldkamp who I’ve photographed previously.  I know her style and her look was perfect for what I had in my mind’s eye.  I contacted both and arranged a date.  I asked Amanda what to bring in terms of clothing and to bring some chunky jewelry.  I also sent Sasha a tear sheet with looks / makeup I was trying to achieve.  We were set.  Upon arrival Sasha spent about 30-45 minutes on Amanda’s makeup while I did final lighting adjustment.
 
 
Lighting and backgrounds at M10 Studio was set up the day before the shoot.  To get the effect I wanted I needed to photograph Amanda against both a black and a white background using similar lighting.  The background consisted of Savage seamlesswhite paper on a Savage background stand, and another background using Savage black seamless paper on another background stand.  Lighting was a clamshell setup using an Elinchrom27” Softlite Reflector beauty dish as the top half of the clamshell and as the key light.  A ProMaster SystemPro 42”ReflectaDisc 5 on a small Manfrotto lightstand was the bottom of the clamshell for fill light.  I used the silver side of the reflector.  Studio lighting in the beauty dish a single Elinchrom D-Lite 4.  I also had a second Elinchrom D-Lite 4 in an Elinchrom softbox standing by for additional fill light if needed.
 
 
We started off against the white background and I set my Nikon D300s in manual using ISO 200, f/8 and speed at 1/160.  For the entire shoot I used my AF-S NIKKOR 70-200mm f/2.8G ED VR II lens.  I think I’ve said before, but this lens is amazing.  I varied aperture during the shoot to get the proper depth of feel and lighting effect.  I also moved Amanda closer and farther from the beauty dish to get the proper lighting.  We also did several shots without the fill reflector.
 
After doing about 20-30 minutes against the white background I moved everything over to the black background and we did the same lighting.  During the shoot Amanda changed her top a couple of times and changed up her jewelry.  The first set I simply had her pull the straps of her tee off her shoulder to give the implied look.  This was the look that we really liked.  
 
After about an hour we were done.  Oh yes, we also did a few minutes against a concrete wall playing with shadows, but that wasn't really part of the shoot.
 
Adjusted in Lightroom 4 before converting to B&W in Photoshop CS6

Same image after converted to B&W in Photoshop CS6 for the desired effect
Post processing was equally important for this shoot because of the desired Black & White effect I wanted.  Therefore, the first thing I did (which is part of my normal workflow) was to import my images into my main computer, add tags / keywords and then import them into Adobe Lightroom 4.  I used LR4 to do most of my adjustments, mainly curves adjustments and Clarity.  Amanda has really nice skin so not much work was needed on localized skin work.  I then imported the desired images into Adobe Photoshop CS6 and finalized the processing.  In each shot I added just a hint of surface blur to soften Amanda’s skin and added a black and white layer.  I adjusted the black & white layer to taste.  And with that I got the desired results.  I was really happy with the shoot, the images and as always happy to work with Sasha and Amanda.

After action report:

·         I’ve said it before and I’ll say it again – watch the hair. Amanda’s hair was blond and that worked well against the white background.  However when I got it against the black backdrop I missed a bunch of the flyaways.  Guess what I did spent time on in post??

·         Use a lightmeter.  I have since purchased a Sekonic lightmeter, but during this shoot I spent probably 5-10 minutes at start getting the lighting just right for the effect I wanted.  Since then I’ve done a shoot with my Sekonic and it really helped.

·         I should have brought jewelry specific to what I wanted to capture.  Amanda brought a few pieces that worked great, but I wanted a few pieces that were chunkier.  OK, here’s the problem, I’m a guy so I don’t have jewelry just hanging around.  Guess I’ll just have to work with what my model brings.

·         Bring an assistant.  It would have been better to have someone hold the reflector or adjust the lights as needed.  OK, OK I know I can do this myself, but let’s face it, it would make the shoot easier.

Wednesday, August 15, 2012

Dean & Abigail Shoot

I know local photographer, Dean Scott, and I am Facebook friends with a local model, Abigail Duff.  Dean visited our M10 Studio’s First Friday event last month.  During his visit I gave him a tour of the complex where  he expressed an interest in shooting there.  No problems, just let me know.  I like his work / style so I figured it would be a good learning experience for me as well to watch him work.

We caught up at a recent Creative Meet-up in Indianapolis and he said he wanted to shoot.  I said sure, so we had a gig.  My plan for the shoot was to let him use the studio as a place to store his kit / give Abigail a place to change and escort him while in the building.  I also volunteered to handle lighting, help him set-up, but he really didn’t need the assist.

I’ve not photographed Abigail, but have seen her images online and others have said she’s great to work with.  I was therefore excited to work with Dean and meet with Abigail, and even take a few shots.

Dean & Abigail arrived on time and we got going.  Dean had a really interesting setup for his kit.  He does most of his model work outside of studio, so he organized all of his studio lighting, modifiers, camera & accessories packed in a large roller case.  He replaced the case’s small plastic wheels with large “all terrain” wheels.  Quite the setup.  At minimum he had: 

·         Alien Bee B800 studio light
·         Alien Bee B1600 studio light
·         Paul C Buff PLM umbrella
·         35” Octabox with G35 grid
·         Large beauty dish
·         Vagabond mini battery
·         Miscellaneous Pocket Wizards
·         Nikon D7000 

Dean had a portable studio, and it was clear he had worked this kit before.  He was able to set it up and break it down quickly.  Abigail also came prepared with multiple changes of clothes and shoes.  Nice thing the studio has a place to hang clothes!

Dean & Abigail did 4 sets.  One in the middle of a large space with natural light flowing in.  All industrial, all gritty.  The next was against a large unfinished wall with the aluminum stud supports exposed.  I gave Dean a recommendation to move the one Alien Bee B800 with the gridded Octabox camera left and close to Abigail.  The idea was to get some hard shadows.  Worked out great.  I asked if I could take a few shots using the lighting setup (borrowed a PocketWizard) so I stepped in for a few minutes.  I used trusty Nikon D300s my new AF-SNikkor 70-200 f/2.8G VRII.  That lens is AMAZING.

Shadows & Pink Shoes
After a change of clothes the next shoot was in a utility room.  The room was dark, dirty and HOT.  Dean set up one Alien Bee with the grid as the key light and the other with a large blue gel camera right behind Abigail as a modifier.  The idea was to cast a blue color on the industrial panel.  Abigail did a nice job posing and getting in position to maximize both the key light and the reflected blue light.  Once again I stepped in after Dean was finished and took multiple shots of Abigail in the same setting.

Blue Wall & Pick Shoes
Finally, we had Abigail change clothes and we headed upstairs.  It was really dark and Dean wanted to minimize the use of the studio light.  The idea was to shoot from a low vantage point and get some of the empty ceiling tiles in the shot.  Created a very dark / edgy look.   I took a turn in this setting also without the studio light.

Upstairs - available lighting, high ISO, converted to B&W
We were done and headed back down to the studio to cool down and pack up.  Before we wrapped up, Abigail volunteered to let me shoot a few shots of her against a white seamless.  Nice.  

Abigail in studio - shot against white seamless
Overall, I think both Dean and Abigail had a good time, and some good photographs.  I also was able to grab a few images myself, although I was a photographer’s chaperon versus a primary shooter.  A fun times.  Highly recommend Abigail Duff, and if possible I’ll hire her for a normal shoot in the studio.

A few thoughts: 

·         Dean and Abigail really didn’t need me hanging over them, but I was the host so I was at their leisure.  The idea is if you let someone use your studio, even if it’s not in the studio make sure they feel welcome.
·         Bring rags when shooting in an industrial / gritty setting.  Abigail got pretty messy during the shoot in the utility room and luckily I brought a small rag and some water.  She was able to generally clean up after that part of the shoot.
·         Always be prepared to shoot.  I honestly didn’t think I would be taking any photographs, but I was able to, and I’m glad I did.  Abigail is top notch and I really liked to results.
·         Pay close attention to how other photographers shoot.  I spent most of my time watch Dean’s shooting style and lighting setup.  I also watched how he worked with the model.  Some good tips on compact lighting setup.
·         Bring a fast lens.  I had a pro f/2.8 and in some settings I was still shooting wide open.  Dean had a variable aperture lens and he had to crank down his shutter speed and increase his ISO to get tack sharp. Not a problem with the studio lights, but available light was a problem.  A wider aperture gives you more flexibility
·         Get everyone’s contact information – man, I didn’t get Abigail’s.  Wait, that doesn’t sound right, having a guy asking a gal for her number…. 

Friday, July 20, 2012

Plastic

I had a good idea for another themed model photoshoot.  This time “Plastic”.  The idea was to use heavy makeup to create a skin effect that gave my model’s skin a plastic looking effect.  More out of science fiction than the freak-a-zoid looking robots from Sony or other Japanese manufacturers.

While researching for the shoot I came across the following image.  This is what I was going for.

The Original Idea
With my theme in hand I created a photo storyboard of looks I wanted.  Sasha Starz, the MUA I usually hire, was contacted to see if she wanted to help.  She was onboard.  Based on my main image I was leaning to hiring a model of color, but didn’t have anyone in mind, so as in the past Sasha was asked to help.  She identified Cory, a local model who goes under the model name of Amyle Leon.  

I checked images of Cory, and determined she was perfecto.  Tall, lean and straightened hair (more on this later).  We even had a chance to meet up before the shoot at a local Artist Meet-up get together.  Yep, she was what I was looking for, and seemed really interested in working with me.

Over the next week I was getting doubts how we were going to pull this off.  Do I  pull Cory’s hair back, what type of lighting, background color, clothes, etc.?  This theme wasn’t developing as easily as hoped. I decided to just go for it, and do lots of adjustments in studio.

Wanting maximum flexibility in lighting & backgrounds, I went to the studio the evening before and set up 3 backdrop and 2 lighting setups. I used Savage Seamless Background Paper brand fashion grey, pure white, and black.  Got all the lighting set up, so less time would be spent setting up when Cory arrived.

Day of the shoot and everything was ready to go.  We scheduled to shoot for 7’ish and everyone started to arrive at M10 Studio.  The second Sasha and Cory arrived I thought, “oh no”.  First, Cory didn’t have straight hair anymore, but a modified, loose afro.  Yikes, and secondly she brought her boyfriend.  Now, don’t get me wrong, I encourage models to bring a friend or escort, but the problem tonight, I hadn’t expected it.  More, on why this was an issue later.

Anyway, in her normal professional manner, Sasha got to work.  We talked about Cory’s hair and decided pulling it back in a ponytail wasn’t going to work.  No way to get her hair tight to her skull, so we decided to go a ‘natural.  A photographer has to be flexible.  We discussed makeup, making final decisions on several colors.  Off we go. 

While Cory and Sasha did their thing I wanted to do a final lighting setup and then chat up Cory a bit more to get to know her better and talk more of what I had in mind in terms of posing and lighting concepts.  That’s where Cory’s boyfriend changed the flow.  Don’t get me wrong, he is a really cool guy; the problem is I enjoyed talking to him so much I didn’t get a chance to focus on Cory or getting my lighting setup finalized.  I knew that was a bad move.

Anyway, Cory was ready, and honestly the makeup concept I had in mind just wasn’t going to be pulled off.  Cory’s hair was going to create too many shadows on her face if I put my studio lights directly above with minimal diffusion as planned.  We got started against the black backdrop and I did several test shots to get the camera settings down.  I used manual mode with shutter speed at 1/160 second, f/8 aperture setting and ISO at 200.  This is the normal setting I use to get started and adjust from there.  All photos were taken with a Nikon D300s mounted with my AF-S Nikkor 24-70mm f/2.8G ED.

Camera locked in, and off we went.  I moved Cory around, moved lighting, changed position, etc. and just didn’t get the “plastic” effect I wanted, and so I decided to focus on more of a standard portrait shoot.  I brought some bubble wrap so I thought I could use it to get a “plastic” effect by using it as clothing later in the shoot.  Lighting throughout the shoot consisted of 1 or 2 Elinchrom D-Lite studio strobes as my key lighting, and 2 Nikon SB-600 speedlights for fill lighting, and to add effect onto the background.  I used different modifiers on the Elinchrom studio lights, but later in the shoot found a 30 degree grid worked the best.


After about 30 minutes we switched to the fashion grey background and changed the lighting.  This time I put a large Elinchrom beauty dish with a white diffuser on an Elinchrom D-Lite for the key light.  I set the power to the lowest setting, but very close to Cory.  I used another Elinchrom D-Lite with a grid at higher power.  My goal was to get much more dramatic shadowing.  Once set I shot multiple photos moving the lighting around.  On several shots I turned off the key light and simply used the gridded light.


After about 30 minutes Cory changed clothes replacing her clothes with bubble wrap.  That was interesting since I was still trying to get at least something along the Plastic theme.  I think we hit on a good idea by using bubble wrap as bikini styled top, and worked the shadows.  We played with this for about 30-45 minutes.  Cory, Sasha & Cory’s boyfriend all contributed to ideas how to get the right effect.  

Bubble Wrap
Overall it was fun, but I really didn’t get the themed effect I was looking for.  Ultimately, that’s OK, because I still was able to get some quality time in the studio, met a new cool guy that I'd like to hang out with, and walked away with some good images. 

OK, as always you get my daily dose of after action tips & thoughts.  Not to disappoint: 

·         Be very specific about the theme with the model, including how you expect them to prepare.  In this shoot it was specifically my model’s hair.  If I knew it was going to be changed up, I would have either changed my theme or rescheduled.

·         Escorts, boy/girlfriends, significant others are A-OK, but note to self, ask first if my model is going to bring someone.  At minimum I should have simply welcomed him, made him comfortable and went on with my business.

·         Have a backup plan for a shoot if for some reason you first theme just isn’t working.

·         Don’t do 2 model shoots in 1 day.  I did on this day, and I was feeling it around 10pm while cleaning up the studio.  The first one was before sunrise.  Yikes.

·         Meet your model in advance if possible.  I did and it really helped me get to know Cory a bit in advance.  She’s a good model and was fun to chat with.  I felt completely at ease with her and I think the earlier get together helped.