 |
| San Francisco skyline from Treasure Island at sunset |
I just completed a photo workshop and series of photowalks with photographer, Chris Marquardt. The workshop was in San Francisco and focused on street photography, after dark fire dancing photography and after dark city scenes around San Francisco. I’ve followed Chris’s work, website & podcasts and learned about the workshop from one of his podcasts. Since the focus of the workshop was photography after dark and street scenes I thought it would be enjoyable and a great learning opportunity.
 |
| Chris Marquardt interacting with street art |
I was right about the workshop. It covered several areas I enjoy shooting, but I have to admit it was humbling. Chris knows his stuff and it highlights how much I have to learn and develop my photographic eye.
I arrived late on Thursday and met up with the workshop participants at the end of their introductory get together dinner. I’d say over ¾ of the 12 participants had either worked with or been on a previous Marquardt workshop. Therefore, a number of participants already knew each other. I figured that would make for a very interactive experience. Most people were starting to call it an evening, but I got to meet most of the photographers, and chat them up a bit.
The workshop started officially at noon on Friday so I got up early and walked around San Francisco for about 4 hours during rush hour shooting the day unfolding. Got lots of the standard SF tourist shots of cable cars, city scenes, Chinatown, etc. The shooting conditions were great since the light was muted by the typical SF weather.
We then met up and headed to Oakland for start the workshop at the Oakland Warehouse base for the Department of Spontaneous Combustion. This is a live-in artist colony focusing on industrial metal sculptures along with sculptures that spew fire. A very unusual mix. The location is a non-descript warehouse in a rundown part of Oakland. Lots of really cool equipment and sculptures in the warehouse to shoot. We spent about 5 hours talking about all things photography focusing on the technical side of photography (versus composition). The key learning experience for me was to use a grey card to check and set exposure. In the past I used a grey card only to set white balance. Also, Chris is big into manual shooting so the grey card is very important.
 |
| Stop action fire dancing |
 |
| Double loops of fire |
 |
| Grinding away |
 |
| Playing with fire |
When the night came we spent about 2 hours shooting 2 fire dancers. For those who are uninformed, like me, a fire dancer uses various props that are lit on fire, i.e. a long staff with material (Teflon) on the end that is lit on fire. The staff is spun around in various ways to produce a really interesting light show. The equivalent of a ball and chain where the ball was on fire was also used. The artists were quite skilled, and after with long exposures the images are amazing. When the exposure is set correctly the fire looks like it’s alive. I’ve never photographed fire before, so it was a challenge. Luckily, Chris was there to lend advice. All my images were shot with either an AF-S Nikkor 35mm f/1.8G or my AF-SNikkor 24-70mm f/2.8G ED. Even with my fastest glass I used my tripod, ISO at 1600-3200, and most shots were in the 1 second range. Lots of tasty motion blur with the fire dancers, which is what we wanted. Day 2 started at 1pm, so once again I had a chance to go out before the workshop. I walked down to the Ferry Building about 20 minutes from the hotel. There was a huge street fair and farmers market going on. It was a people-a-rama. A photo rich environment from the homeless, beggars, artist, pretty people, and just folk. Great fun. I shot everything. I then made my way back to the hotel to change my kit and then headed to the Embarcadero YMCA for a workshop on both street photography and after dark shooting. I have done lots night photography so it was nice to hear that I wasn’t a complete idiot. However, I still wanted to practice my skills. The street photography part is something I want to do more of. The key for street photography is either to blend in and capture the scene or get REAL close and shoot people. We went for the close portrait work on the street.
The key in late night photography is to take your time, adjust your ISO last and experiment / adjust your white balance. Chris stressed you should focus on setting your WB to the temperature setting and adjust Kelvin. As you might suspect even when shooting in RAW, NEVER use the automatic white balance setting. The key on street scenes is placement, and capture the environment. If you are going to shoot people then interact and get close. Ask your subject if you can shoot their picture and then take shots from multiple angles. Think of the person on the street that you are shooting as your model and watch for lighting, shadows and expression. Getting a complete stranger to let you take their image is challenging. Some of our workshop members were amazing at it. I’m a noobie.
After the workshop portion of the day we boarded a bus and hit a number of city locations. For the street photography component of the night we paired off. We visited a food festival in the Mission District. Tons of people and lots to shoot. After shooting street scenes for about 2 hours, we reboarded the bus and went across to Treasury Island and shot the skyline and Bay Bridge. It was foggy, windy and cold. It really was a challenging shooting environment. I brought a Silk UFS-F740 Lightweight Tripod which was needed due to low light, but I still had lots of camera shake due to the wind. After about an hour we boarded the bus and headed for a spot across from the Golden Gate Bridge to try our hand at a typical tourist image. The first of the two locations to view the Golden Gate Bridge was a bust due to fog, but the second was amazing because the fog was moving out and it gave us some amazing scenes of the bridge and city.
 |
| Mexican heritage at the food festival in the Mission District |
 |
| Street portrait at first reluctant to get photographed |
 |
| Street portrait in the Mission District |
All shots in the Mission District were with an AF-S DX Nikkor18-200mm f/3.5-5.6G ED VR II lens, ISO at 400-800, speed 1/100 - 1/250 second and white balance set at cloudy. All of the shots after dark were with my 24-70mm f/2.8 lens, camera set to manual, White Balance varied throughout the evening to get different temperature effects, ISO was ranged based upon the shutter speed I wanted varying from 200 to 1600. I also adjusted my speed through the shoot. Basically I was experimenting.
 |
| Golden Gate Bridge in the fog |
We got back to the hotel really late, but it was great. I contemplated going back out on the streets, but decided to crash.
Day 3 was earlier, so I didn’t go out before the workshop. We met up at the Women’s Building in the Mission District. We talked primarily about composition of street photography and several technical aspects. It was amazing to see some of the images Chris had brought to discuss composition of the street, primarily Vivian Maier and Henri Bresson. If you don’t know the story of Vivian Maier then I would encourage you to check her out…amazing.
 |
| Watching life go by |
During the 3rd day we went out on the street and shot people again. Also we had a chance to shoot each other in both a comical and a serious setting. It was fun to see how everyone captured each other. I rarely see myself on the other side of the camera so it was fun. After the workshop was over we took a group photo, exchanged emails and wished each other good luck. Lots of really great photographers all of who I would enjoy going back out with again. Finally, after the day’s workshop was over I got back to my hotel, again changed out my kit for another romp on the streets and headed back out. I walked down Market Street and then back to the Mission District. There I got lots of shots of graffiti, people interacting with others, tourist, homeless, you name it. Life in the big city. I ended out being out for about 5 hours and got back at my hotel well after dark, finally calling it a day.
 |
| Street Rapper along Market Street |
 |
| Mission District graffiti |
 |
| Mission District graffiti |
Bottomline, I had a great time. I learned a great deal and met some good photographers. Chris was an excellent workshop leader and host and he was able to impart a good deal of photographic wisdom on his charges. I will definitely do something like this again.
A few tips / comments:
· When traveling plan your camera kit carefully. This time I packed just right primarily because I wanted to get everything in one bag. I brought my 35mm f/1.8G prime, a 24-70mm f/2.8G, an 18-200mm F/3.5-5.6G, and finally a Tokina 12-24mm f/4 wide angle. Also, 1 SB-600 speedlight (which I probably could have left behind), one camera body, plenty of CF & SD cards and the Silk tripod mentioned earlier. I really didn’t want to take too much or leave something important at home. I planned my kit specifically for what I was going to shoot. · One tip Chris shared with me on the bus, “don’t use clear filters on your lens”. This is another piece of glass that light needs to go through and even high end filters can impact the amount of light going through your lens. The only time to use clear filters is in dusty, sandy or salt water environments. Also, always use your lens hood. This provides lots of protection to your lens, and much more than a clear filter.
· When shooting people in the street, be brave and ask if you can photograph them. I was amazed that almost everyone agreed. OK, a few thought it was weird and said no, but more than 50% said “sure”. Talk to them, and shoot from various angles. Get their contact information and remember to send them copies.
· If you are doing a workshop especially in a different city, then spend every waking hour talking about or taking photographs. I could have slept in or hit some of the tourist sites during non-workshop times, but I was there to take photos, so every waking our I was either working on the photos or taking photos.
· Bring a backup hard drive. I did this and every night I loaded my images onto my computer and also onto the backup hard drive. I didn’t want to lose any of my shots.


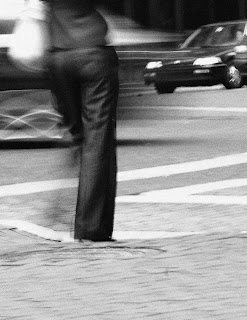 This image of a young lady's backside was taken during the day. I had my camera on a tripod about 25 feet back from an intersection. I used a cable shutter release to minimize camera shake. This may seem a waste since the idea was to get a blurry picture. However, my goal was to get motion blur but as sharp of focus as possible on my subject. I set my camera at F/20 for a deep
 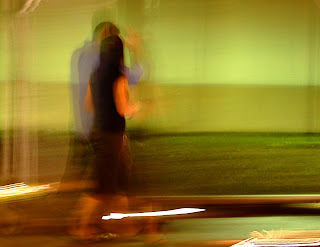 I took this photo last night while out on another