Showing posts with label Portrait. Show all posts

Monday, March 18, 2013

Busy, But Did 3 Shoots

It's been a busy couple of weeks, so I haven't been able to contribute to my blog as I want.  Anyway, as you know from my earlier post I purchased some upgraded lighting and modifiers for the studio.  I've had a chance to use the new equipment 3 times over the past week.  I did 2 lighting test shoots with models I will be working with again in the near future (at least one of the models), and a full shoot with another model.  Not only did I get a chance to try out my new kit, but also work with 3 models I haven't worked with previously. 
 
I'll make a more formal post ASAP, but bottomline, the new Elinchrom and Rotalux equipment is uber.
 
Teaser photos from the shoots
 
Lighting test with model Cecilia Hernandez - won't be able to shoot with her again as she was just signed by BMG

Lighting test with model Laine Lindsey

Model shoot with Cynthia Cai
 

Sunday, March 3, 2013

Jacks Von Liria in Black & White

Makup Artist and Stylist, Jacks Von Liria
I had the chance to help makeup artist Jacks Von Liria with a project by creating a series of photographs he wanted to use on his website.  He reached out to me and asked if I would be interested in helping him out by doing a few headshots, portraits & profile images for his various online uses.  Since he wanted Black & White photos I volunteered.  I was in the middle of a B&W theme so timing was perfect.  We agreed to a trade.  I would shoot his images, and he would do the MUA job for one of my shoots.

Jacks is a local makeup artist and hair stylist so he wanted photos with more of a fashion vibe.  He would bring 2 models and his website designer.   The plan was straight forward.  Since the shoot was B&W would work on a fashion grey sweep using a single Elinchrom D-Lite 4 studio strobe equipped with an Elinchrom 27” beauty dish reflector.  The idea was to get a balanced, offset light with moderate to strong shadows.  Everything was to be photographed using my Nikon D600 with the AF-S Nikkor 24-70mm f/2.8 ED-G lens.  Camera metered in at ISO 160, f/11 & speed at either 1/100 or 1/125.
Everyone arrived on time and Jacks immediately started making up the models, Caroline Nauth (if you’ve read my blog you know I’ve worked with Caroline several times) and Crystal Kay Velez.  While Jacks was getting the models ready to go I played around with Caroline photographing her against a grey wall and showing Jacks website designer, Shonn Piersol, how the control light with a camera.  Fun stuff…ok, fun stuff for a photographer.  I also photographed both on the grey seamless and got some good photos, although they were not part of the series.

Shonn Getting Into The Action
The models were finished and away we go.  We did a number of settings for Jacks.  He did a good deal of directing since he had a vision in mind what he wanted and I took it from there.  We did multiple arrangements with Jacks alone, Jacks with Shonn, Jacks holding his MU brushes, the models, and the models with Jacks, etc. etc.  I photographed standing up, sitting down and moving around.  I constantly moved the light around as well to get different shadowing.  I arranged the group multiple ways to get the desired effects.  This was working great.  I was a bit concern that the sweep wouldn’t be wide enough, but it ultimately wasn’t a problem.  Jacks was wearing high end attire on so things were looking good.

Jacks & Shonn
 
Caroline, Jacks, Crystal & Shonn
Finally, Jacks changed into very high end casual styled clothes and I did a series of head shots.  These also turned out really well.  He has a very expressive face with works very well in B&W.   As with the group shots I took a good deal of guidance from Jacks since he had a look in mind and then I posed him from there.  And after about 3 hours, it was a wrap.  It was a fun time with the entire group, I got to meet a model I’ve wanted to meet, met a new friend in Jacks, and got to meet another local Indy business man who also did well in front of the camera.  It was a wrap.
After action tips:
  • Remember Steve, makeup takes a long time, especially if you throw in hair.  I've got to find something constructive to do while I have this time to kill.  The new studio will help with this,
  • Talk to your client.  Jacks had a very distinct look in mind for the photographs and if I just took over it wouldn't have worked out,
  • Take advantage of barter deals such as this.  The following weekend Jacks returned the favor and did an amazing MU job on Caroline (again) for another one of my shoots,
  • Try something new.  I've not shot a group fo 4 in studio, so I thought this would be a bit of a miss, but with simple posing, positioning and shooting angles it came out great.
 

Monday, February 4, 2013

3 Different Shoots - Same Caroline

I had an opportunity to do 3 photoshoots this weekend at our M10 Studio.  All 3 were with Indianapolis model Caroline Nauth.  Thought I would give you a quickie rundown of the shoots.

The first shoot was primarily as a photo-gopher for a photog colleague who wanted to use our studio.  He had hired Caroline to do his shoot, so it was perfect.  As soon as he was done, a quick studio straightening up and then my shoot would kick off. 

My first shoot was a collaboration between me, Caroline and my go-to MUA, Sasha Star.  Caroline wanted to try a "Tim Burton" type vibe.  Sasha was totally in, and so was I. 

Caroline getting her Tim Burton on
Right after the first session wrapped up, Sasha arrived and we jumped right in.  Took about 1 hour for the makeup.  We shot in studio and in the industrial space.  Very cool.

On Sunday, I joined LA based fashion photographer, and my 2 studio partners, Paul D'Andrea & Eric Schoch along with MUA Jacks Von Liria to photograph Caroline.  This shoot was all about darks and lights since the shots were going to be processed in B&W.   

Believe it or not, same girl!
We started early (because today was the Super Bowl) with Jacks working his magic on Caroline's makeup and hair.  We used a single beauty dish along with several black foam core light blockers.  We spent about 3 hours going through 4 clothing changes....Caroline, not the photographers, and really came out with some amazing photos.

OK, that's it for now.  Once again it's great to work with a talented model...and hey, anytime I get behind a camera it's all good.

More detailed blog post on the shoots ASAP.  Wait for it!!

Monday, December 10, 2012

Busy Weekend - Ashley, Bill & Kristen

Had a busy weekend doing model shoots at M10 Studio.  I'll write more detailed posts in the coming days, but wanted to drop in a teaser. 

On Saturday I did the second in my Tattoo Style series photographing model Ashley Ogburn.  Ashley has quite a few stylized and fun tattoos.  I did this session with local Indianapolis photographer Chris Pickrell & MUA Emmy Lindgren.  We did a session both in studio & in the industrial side of the building.

Ashley Ogburn showing off some of her tattoos
On Sunday I hooked up with Los Angeles based fashion photographer Bill Jones.  He had offered to show me his stuff during a shoot with model Kristen Renee Grable and MUA Tiffany Holmes.  I was surprised how awesome Bill's photography and skills are and how he does it all with a 50mm prime and one light.  I can't wait to work more on this style. 

iPhone photo of Bill & Kristen both down low
Stay tuned to this channel for more blog-postery on this weekend's sessions.

Saturday, November 10, 2012

Walking Dead – Broad Ripple Style

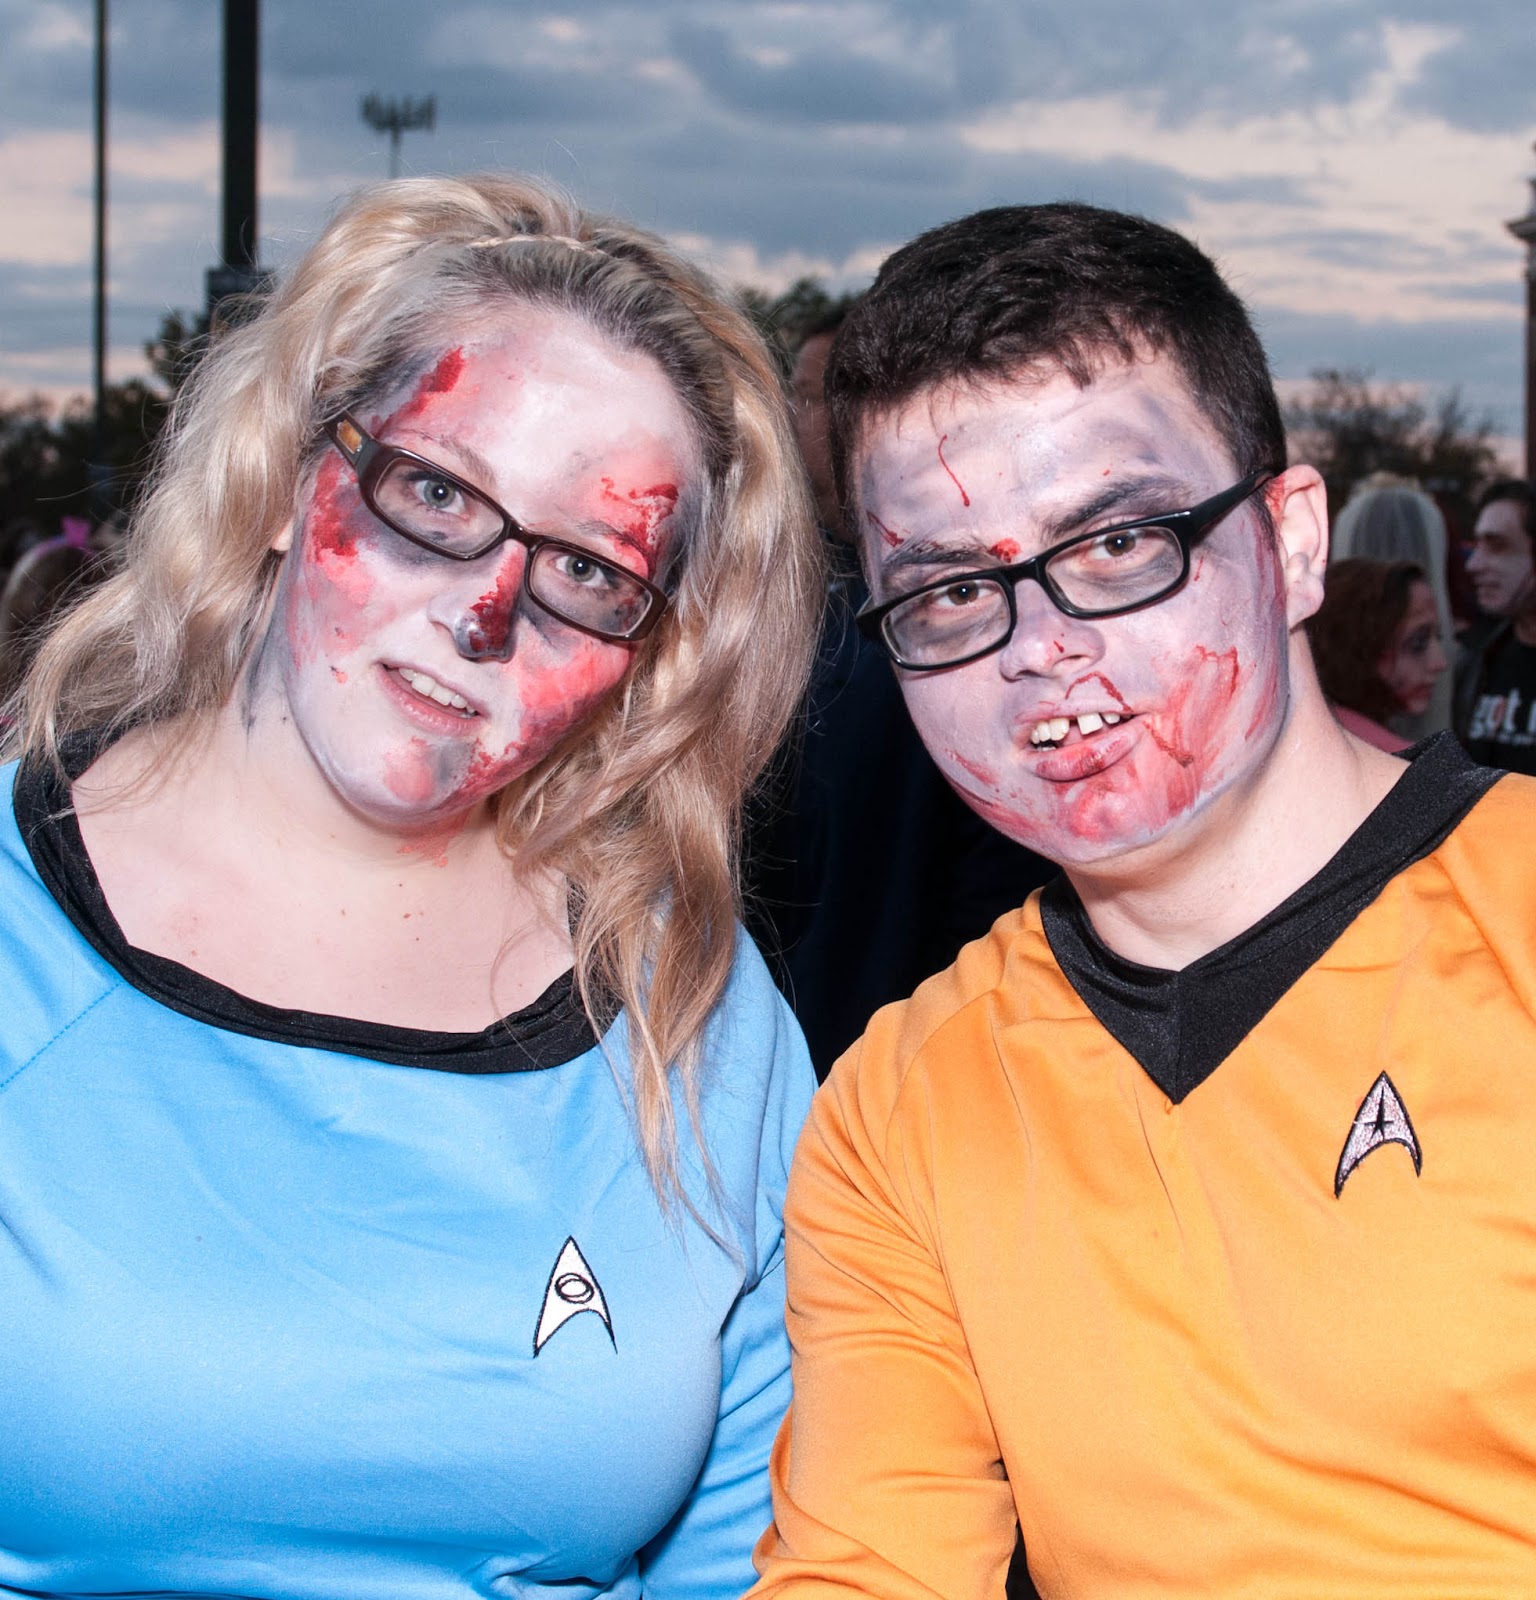
Can I suggest visiting a dentist?
For the second year I went to the Broad Ripple Zombie Walk exclusively to photograph the event.  This is a really fun event that gives participants the opportunity to get their zombie on and to benefit Gleaners Food Bank.  This year’s event took place the weekend before Halloween.  The event is hosted by IndyMojo.
 
I would guess about 500 people showed up.  I arrived early and picked up my media pass.  I brought the following kit knowing there would be bright light ending-up pitch black: 

·         Nikon D300s
·         AF-S Nikkor 35mm f/1.8
·         AF-S Nikkor 24-70mm f/2.8
·         AF-S Nikkor 70-200mm f/2.8
·         Nikon SB-600 speedlight

Soon after I got myself organized people started to show up.  Most came with their zombie make-up already on, or took advantage of the 3-4 makeup artists.  People could get made-up for free at the event.  Early on people simply walked around talking, listening to the DJ, dancing, or just looking at other people’s make-up.  Some people were SERIOUSLY into the event and had amazing make-up.  
 
Like, "what-everrr"

Seriously, awesome!

Smile for the camera
I started off with a Nikkor 24-70mm lens asking zombies if I could shoot their street portrait.  Everyone was in a good mood and obviously, had absolutely no problem letting me shoot them (sorry, photography them).  After about an hour I switched out to my Nikkor 70-200mm lens so I could get some tighter shots.  While it was still bright outside I shot in Aperture priority with f/stop in the f/2.8 – f/4 range.  The goal was to get shallow DOF for all street portraits.
 
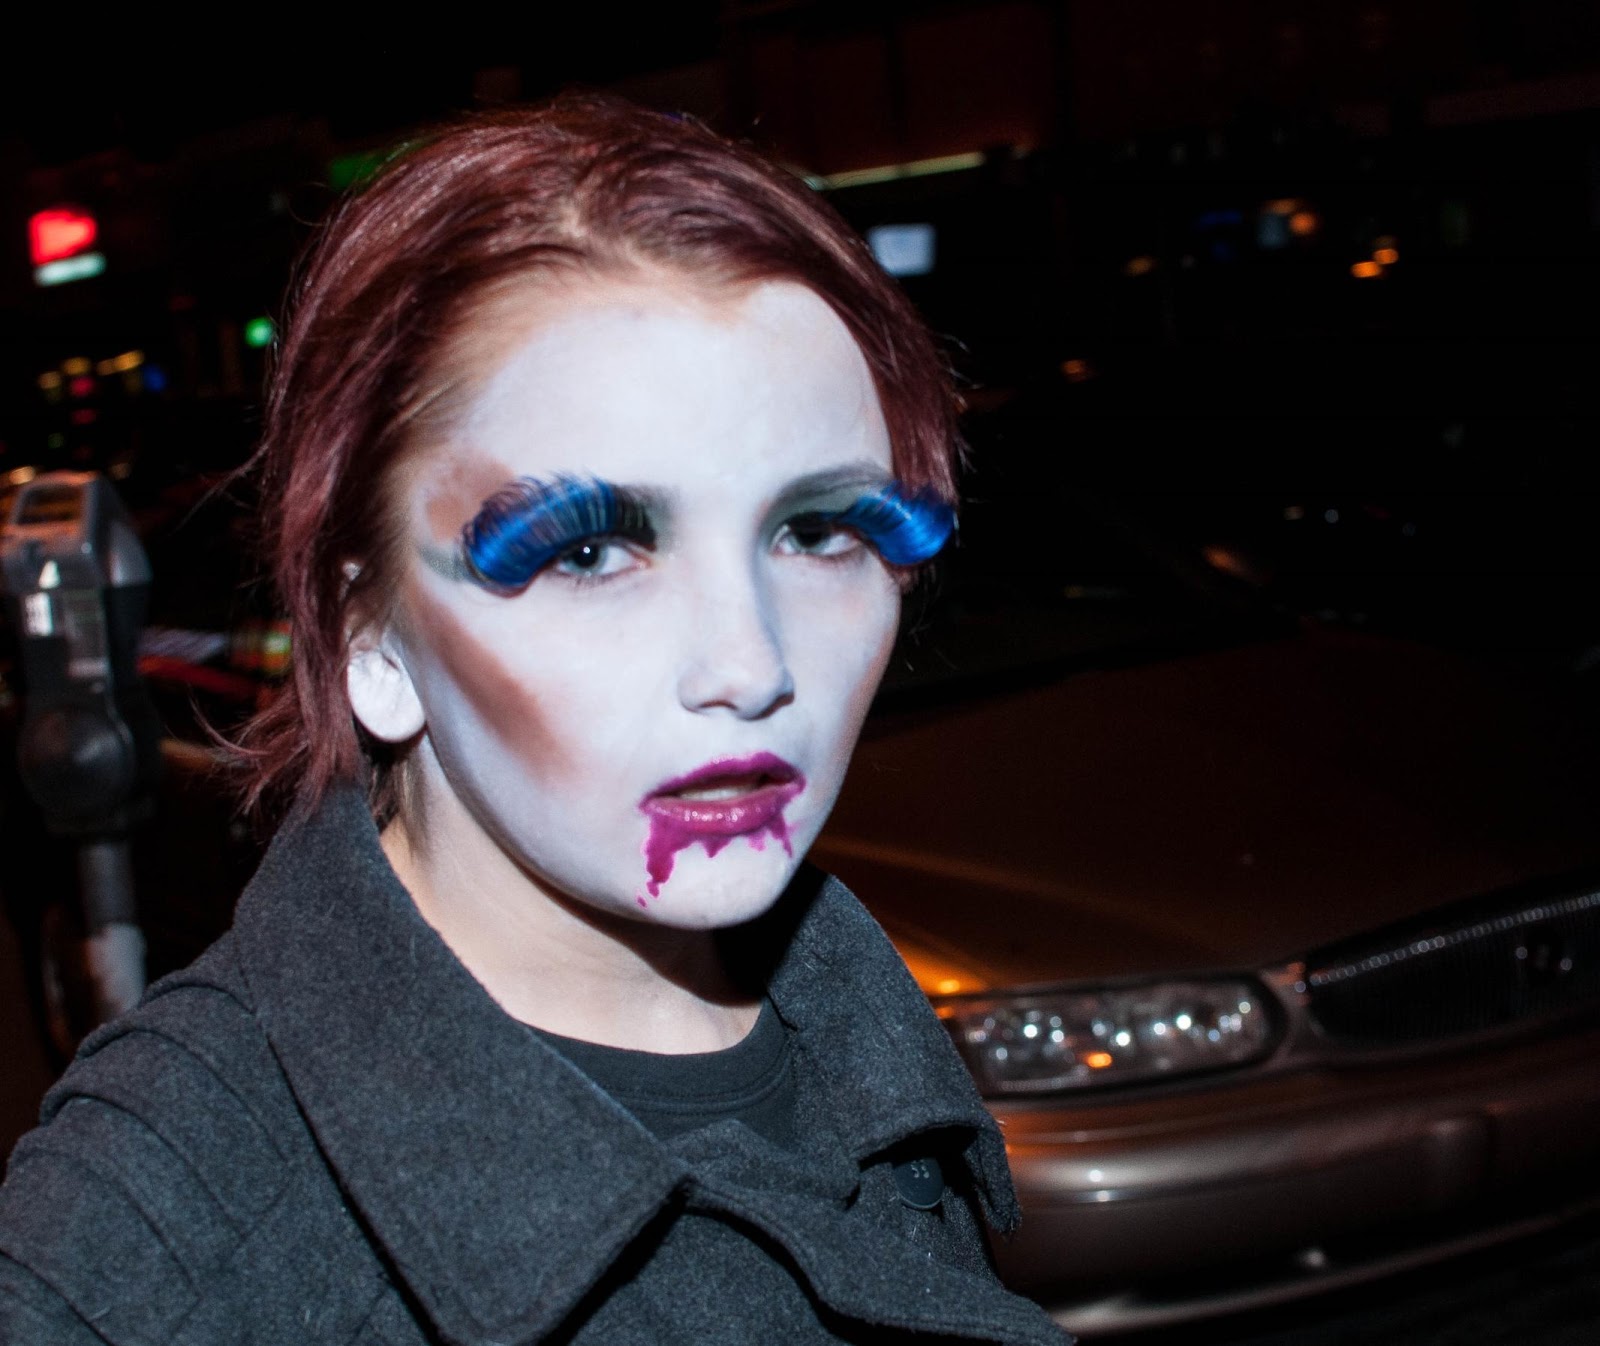
By the time it got dark the place was hopping & PACKED.  Just like a scene from The Walking Dead.  So cool, and fun to watch everyone get into it.  There were kids, families, young couples, hipsters, older couples, couples with babies, singles, you name it.  The event attracted all types.  And let me tell you, people were seriously getting into their makeup.  Some were professional grade.
 
Child's Play

Starting 'em young


You looking at me, you looking at me?

Sorry for interrupting your conversation, seriously
Soon after it started to get dark it was time to do the zombie walk.  This is when everyone walks through the streets of Broad Ripple showing off their stuff.  What a blast.  I switched into my Nikkor 35mm, opened the aperture as wide as possible, and mounted my Nikon SB-600.  I used a large diffuser on my speedlight to get soft indirect light.  I know you aren’t supposed to do it, but the speedlight was mounted on the camera.  Please forgive me!  Anyway, I jumped ahead of the horde, parked myself behind a tree and fired away as the zombies walked by.  It was fun.  The only problem I noticed is that I think my focus point must have been off.  I normally shoot center-point focus and recompose, but I think I must have had my focus point to the left of center, because I had about 30% of my images focusing in to the left of my subject.  With such a shallow DOF this was a problem.  However, I took tons of photos so I still got quality images during the walk.
 
KISS fan

The Corporation is here

Seriously creepy

Time for a mind meld
After about 5-6 hours I called it an evening.  The event was fun and a real photo rich environment.  
 
After action tips for you fellow photogs: 

·        Learn your camera.  In an event like this you don’t want to be fiddling with your kit.  Especially when it gets dark,
·       Remember, people are made up so they WANT to be photographed.  Take advantage of the opportunity.  Only a few people asked me what I was going to do with their image,
·       Bring good glass.  When it gets dark you need your lens to focus pronto, 
·       Go light.  I wanted to, but still had a full backpack.  After a few hours you start to feel it,
·       Talk to the other photographers.  I chatted up a few photogs that I had seen around, but never met.  I like to talk to people especially if I know there is a common interest.
·       Sacrifice ISO for shutter speed.  This event called for tack sharp.
 
 
Portait Time

America's Top Model, zombie-style

Oh no, the military is infected
 

Wednesday, August 15, 2012

Dean & Abigail Shoot

I know local photographer, Dean Scott, and I am Facebook friends with a local model, Abigail Duff.  Dean visited our M10 Studio’s First Friday event last month.  During his visit I gave him a tour of the complex where  he expressed an interest in shooting there.  No problems, just let me know.  I like his work / style so I figured it would be a good learning experience for me as well to watch him work.

We caught up at a recent Creative Meet-up in Indianapolis and he said he wanted to shoot.  I said sure, so we had a gig.  My plan for the shoot was to let him use the studio as a place to store his kit / give Abigail a place to change and escort him while in the building.  I also volunteered to handle lighting, help him set-up, but he really didn’t need the assist.

I’ve not photographed Abigail, but have seen her images online and others have said she’s great to work with.  I was therefore excited to work with Dean and meet with Abigail, and even take a few shots.

Dean & Abigail arrived on time and we got going.  Dean had a really interesting setup for his kit.  He does most of his model work outside of studio, so he organized all of his studio lighting, modifiers, camera & accessories packed in a large roller case.  He replaced the case’s small plastic wheels with large “all terrain” wheels.  Quite the setup.  At minimum he had: 

·         Alien Bee B800 studio light
·         Alien Bee B1600 studio light
·         Paul C Buff PLM umbrella
·         35” Octabox with G35 grid
·         Large beauty dish
·         Vagabond mini battery
·         Miscellaneous Pocket Wizards
·         Nikon D7000 

Dean had a portable studio, and it was clear he had worked this kit before.  He was able to set it up and break it down quickly.  Abigail also came prepared with multiple changes of clothes and shoes.  Nice thing the studio has a place to hang clothes!

Dean & Abigail did 4 sets.  One in the middle of a large space with natural light flowing in.  All industrial, all gritty.  The next was against a large unfinished wall with the aluminum stud supports exposed.  I gave Dean a recommendation to move the one Alien Bee B800 with the gridded Octabox camera left and close to Abigail.  The idea was to get some hard shadows.  Worked out great.  I asked if I could take a few shots using the lighting setup (borrowed a PocketWizard) so I stepped in for a few minutes.  I used trusty Nikon D300s my new AF-SNikkor 70-200 f/2.8G VRII.  That lens is AMAZING.

Shadows & Pink Shoes
After a change of clothes the next shoot was in a utility room.  The room was dark, dirty and HOT.  Dean set up one Alien Bee with the grid as the key light and the other with a large blue gel camera right behind Abigail as a modifier.  The idea was to cast a blue color on the industrial panel.  Abigail did a nice job posing and getting in position to maximize both the key light and the reflected blue light.  Once again I stepped in after Dean was finished and took multiple shots of Abigail in the same setting.

Blue Wall & Pick Shoes
Finally, we had Abigail change clothes and we headed upstairs.  It was really dark and Dean wanted to minimize the use of the studio light.  The idea was to shoot from a low vantage point and get some of the empty ceiling tiles in the shot.  Created a very dark / edgy look.   I took a turn in this setting also without the studio light.

Upstairs - available lighting, high ISO, converted to B&W
We were done and headed back down to the studio to cool down and pack up.  Before we wrapped up, Abigail volunteered to let me shoot a few shots of her against a white seamless.  Nice.  

Abigail in studio - shot against white seamless
Overall, I think both Dean and Abigail had a good time, and some good photographs.  I also was able to grab a few images myself, although I was a photographer’s chaperon versus a primary shooter.  A fun times.  Highly recommend Abigail Duff, and if possible I’ll hire her for a normal shoot in the studio.

A few thoughts: 

·         Dean and Abigail really didn’t need me hanging over them, but I was the host so I was at their leisure.  The idea is if you let someone use your studio, even if it’s not in the studio make sure they feel welcome.
·         Bring rags when shooting in an industrial / gritty setting.  Abigail got pretty messy during the shoot in the utility room and luckily I brought a small rag and some water.  She was able to generally clean up after that part of the shoot.
·         Always be prepared to shoot.  I honestly didn’t think I would be taking any photographs, but I was able to, and I’m glad I did.  Abigail is top notch and I really liked to results.
·         Pay close attention to how other photographers shoot.  I spent most of my time watch Dean’s shooting style and lighting setup.  I also watched how he worked with the model.  Some good tips on compact lighting setup.
·         Bring a fast lens.  I had a pro f/2.8 and in some settings I was still shooting wide open.  Dean had a variable aperture lens and he had to crank down his shutter speed and increase his ISO to get tack sharp. Not a problem with the studio lights, but available light was a problem.  A wider aperture gives you more flexibility
·         Get everyone’s contact information – man, I didn’t get Abigail’s.  Wait, that doesn’t sound right, having a guy asking a gal for her number…. 

Saturday, June 9, 2012

Before & After

I joined an online critique forum on Facebook to get comments on images from other photographers.  One of the challenges with any pursuit, whether it's photography, painting, being a lawyer, or whatever is to always find avenues to find out honestly how you can do better / improve.

Photographers have many options to get online feedback and post their images.  We have FB, Twitter, Instagram, Flickr just to name a few.  My experience is that whenever you post something online you may or may not get comments or feedback....even if you ask for it.  And almost all the time the feedback is something like: "great photo", "excellent lighting", "amazing", etc.  What is often missing is, "Wow Steve, that image really is dark, what gives..", or "how about if you crop the image down to put focus on your subject".  That is helpful, but I find that most people don't provide constructive comments online.

Well so far the local FB page that is a critique forum appears to be doing this.

I posted this image for comment.  This was a model shot done at the Spark Art Photo owned by Dave Fulton in Indianapolis during a model shoot / party.  The setup was pretty standard - black background, large softbox camera right, reflector camera left, manual mode.  This shot was taken about 6 months ago.  Model compliment of LModelz

Before - model from LModelz
I thought it pretty good, so posted it for comment on Flickr, etc.  Got lots of really positive feedback and comments.  However, I also posted it on the photographer critic group and got the following comments:
  • My model's face is too cool
  • There's lint on you model's shirt
  • The eyes are way too blue (note the model had colored contacts)
  • The image is too dark
There we go.  Solid feedback, and when I looked at the original I thought...you know my model's face is too cool, man, I didn't even see the lint, and yes too dark.  So I made a few adjustments in the image and here it is.

After - Model from LModelz
Honestly, there may not be much difference (I would suggest you view the image at full size since the small blog thumbnail doesn't provide full effect), but there are subtle changes that a photographer will pick out.  This is the type of feedback that all photographers need.  How can we be better.  Don't shy away from it, be bold and ask for constructive feedback.  I know I will.


Monday, April 30, 2012

Themed photoshoot this past Saturday at M10 Studios.  The theme for this month was Kabuki Girl.  It was all about colored backgrounds and white body paint.  Hope to get a detailed blog post up this week.  Stay tuned!!

Model - Mina Vee & MUA by Sasha Starz


Sunday, March 4, 2012

Contemporary Glamour


28mm, speed 1/160, aperture f/13, ISO 200
Time for another model photoshoot.  I’ve recently done “themed” model photoshoots.  The idea is to do something different each time whether it’s a unique setting, different lighting, different looks, or unusual clothing.  This time was no different.  

First I needed a theme.  Normally, this isn’t hard since I have tons of themes littering my brain, but I always do research.  I decided on “contemporary glamour” for this shoot.  The idea came to me after looking at old black and white glamour photographs of 50-60’s movie stars, especially Marilyn Monroe.  With a theme in hand it was time for planning.  For this shoot I wanted a makeup artist, hair stylist, and a studio.

First thing was to hire a local model. My criteria were specific.  A model with some experience, an interest in glamour-like work, a bit hard-girl (i.e. tattoos) style and medium length blonde hair which would allow for a Marilyn Monroe hairstyle.

I found the model I wanted using my Facebook contacts, and after a few back and forth messages she said she was good to go.  Facebook has been a good resource for the Indy photography scene to hire models.  I’ve not had any luck with ModelMayhem.

Next, was to select the make-up artist (MUA).  To my surprise this was easy.  I wanted to go with someone familiar, so I contacted a MUA I met previously.  I reached out to Sasha Niles-Carnes, and she said yes.  BTW, her work is uber.

Next up, the studio.  I’ve used a friend’s Stutz Building studio previously, but this time I wanted more controlled lighting and access to a larger softbox.  I have my own lighting equipment, but didn’t want to use it this time.  Dave Fulton’s Spark Art Photography studio came to mind.  I had shot at Dave’s studio during a year end Christmas party, and knew his space was over the top excellent.  I sent him a message, and arranged to rent his space.

45mm, speed 1/160, aperture f/11, ISO 200

Finally, a hair stylist.  Unfortunately, I didn’t have many contacts that do hair, so I put in a few calls and asked around without much luck.  Anyway, I was chatting with someone in my office who gave me a lead.  I followed the lead and had my hair stylist hired.  I also asked a buddy at work who had expressed an interest in photography if he wanted to help out.  He’s a young guy, and please, the thought of hanging out with a pretty model…I didn’t have to twist his arm.

OK, I had the model, the studio, the MUA, my photog second, and the hair stylist.  The fees were negotiated, and once again reconfirmed the photographer’s fact of life…man, this is an expensive hobby.

Next up was a storyboard.  Not really a storyboard, but a series of 6-8 photographs of the look desired.  I sent this to my “people” so they could think about what was being planned.  I’m always surprised how much work it is to plan out a photoshoot!

What’s the worst thing that can happen to a photographer the day before a shoot?  You guessed it…my model contacted me and said she couldn’t make it.  ARGH!  I really wanted to photograph with her, and the last thing I wanted to do was call everyone else and tell them I had to cancel.  Being in business as my day job I realize schedules change at the last minute, so bottomline I was cool with the fact the model needed to cancel.

What to do, what to do.  I put out a distress call on Facebook, and I was stunned.  Literally within an hour several photogs reforwarded my request and at the same time a number of models reached out to me.  A replacement was lined up in no time.   I was surprised I had a following interested in shooting with me…oh, yes it helps when there’s money involved.

Courtney Kennedy hopped on board and was signed up for her normal per hour fee.  She had the style, a hard-girl look and guess what, medium length platinum blond hair.  Karma.

The day of the shoot.  Got several messages from Courtney and agreed on dress for her to bring.  Medium length, tight, black…  I arrived at the studio.  Dave was already there and was the perfect host while I got set up.  We talked through the lighting, electronic triggers, background (I wanted a solid black background for the portraits), and timing.  He then left me to do my thing.  

Sasha, and then Michelle Bueno, the hair stylist, arrived and set up.  I talked them through the schedule, but since they already had the storyboard in advance it wasn’t really needed.  Courtney arrived and they got at it.   

50mm, speed 1/40, aperture f/3.2, ISO 560
For this shoot I brought the following:
 My weapon of choice was the Nikon D300s with the 24-70mm lens for all of the studio and speedlight shots.  I used the D200 with the 35mm or 50mm lens for the shots I took during the MUA/hair work.   The plan was to use the Mamiya for a couple of rolls, but unfortunately we ran out of time without using it.  You know a "Girls on Film" type of effect.

Once I got set up we all chatted while the make-up and hair got finished. The makeup and hair took a little over 1 hour.  I had rented the studio for 2 hours, so this was cutting things close.  No dramas, Dave was cool and said I could use the studio for another 30 minutes, or so if I wanted.  While the makeup & hair was being done I took several candid shots with the D200.  For the candids the D200 was set on program mode.

All, done, so it was time to get to business.  I had 2 sets of shots planned.  The first with Courtney at the makeup table.  The plan was to shoot her reflection in the mirror both touching up makeup and looking off in different directions.  This set used an off camera speedlight with the RPS softbox as fill light and the lights on the makeup table as the key light.  The studio lights were turned off.  I triggered the speedlight with my Elinchrom Universals.  The speedlight was set at manual mode 1/8 power.

Throughout the shoot I was in manual mode, the first series the ISO set at 400, speed at 1/100 - 1/125 and aperture between f/3.5 down to f/4.5 depending on the DOF I wanted to capture.  White balance was set at incandescent.  Since the makeup table had the brightest lights color temperature was adjusted in post.  On the second series which is under studio lights the ISO was set at 200, speed at 1/160 and aperture at f/11 down to f/13.  

I asked Courtney to move around the table, stand up, cross arms, look at me, look off, look at herself, etc.  I shot her close up, standing behind, standing on a stepstool, and into the mirror.  Within 30 seconds I knew she was a pro. 

26mm, speed 1/125, aperture f/4.5, ISO 400

58mm, speed 1/100, aperture f/3.5, ISO 400
 After about 150 images to the backdrop which was the second set planned.  For the portrait / head, upper body shots I used a hairlight consisting of a gridded Paul C Buff striplight on a boom.  The studio monolight was an Alien Bee triggered by the key light.  The key light was a Profoto ComPact-R 1200c monolight with a HUGE softbox.  The monolight was triggered with an internal PocketWizard.  The Profoto was set to ¼ power positioned about 3 feet from Courtney, camera right.  The hairlight was set at 1/8 power and placed about 2 feet above and 6 inches behind Courtney’s head.  Once again the studio lights were off.

Camera in manual mode with the same settings as mentioned above. 

For this series my goal was to capture mainly head and shots from waist up trying to generally replicate poses Marilyn Monroe did.  Courtney needed only limited direction, and when I did direct her, she was a pro.  She held her poses until I told her to move which was great.  We did a series of head shots tight, more open head shots, waist up shots from different perspectives, dress open to show more cleavage, dress closed for a more demure look, & head in different position.  

24mm, speed 1/160, aperture f/13, ISO 200
 After about 150 shots we were finished. 

Oh, did I mention my second shooter had to cancel at the last minute (no major issues), so I asked Michelle who had stuck around to manage Courtney’s hair and watch the shoot to help me by holding a reflector in a few shots and to help Courtney with her dress.  A fun team.

Bottomline, I was completely happy.  It was a fun photoshoot

After action tips:

·         Although it’s often impractical it’s a good idea to have 2 models or someone on standby if one cancels or “no-shows”. 

·         Test the light settings while the makeup is being done.  In this case I didn’t do it because I didn’t have someone to use for the test.  It didn’t really matter on this shoot because I had my camera / lights locked in after just a couple of shots.

·         Keep everyone’s phone numbers and contact information handy and in one place.  Common sense, but I often put information in my notebook, in Facebook, on my iPhone, etc. 

·         Bring copies of photos (hard copies or electronic) to the shoot so everyone can reconfirm what is needed.  In this case I had created a “storyboard” and it worked well.  It was used several times.

·         Make sure everyone gets paid before you leave.  For this shoot I paid everyone before we shot.  Again, common sense to pay people, but after all my planning I forgot to pay the model because she was the last to come in.  I ended up paying her the next day. 

·         Keep your gear organized and know what you brought.  Dave’s studio is well equipped and when cleaning up I could have thought “is that Dave’s or mine?”  I kept everything together on a table.